제6장 Server Administration
5. Qmail 서버 설치하기
VPOPMAIL과 QMAILADMIN을 사용하기 위해서는 반드시 APACHE의 소유권을 vpopmail:vpopmail로 바꾸어주어야 합니다. (/etc/apache2/httpd.conf)
|
# vi /etc/apache2/httpd.conf
User vpopmail
Group vpopmail
|
위와 같이 바꾸고 /etc/init.d/apache2 restart로 재시작합니다.
USE플래그가 제대로 설정되어있는지 확인합니다.
|
# vi /etc/make.conf
USE="apache2 maildir valias vhosts authdaemond mysql"
|
5.1. Install QMAIL
맨먼저 ssmtp, sendmail, postfix가 설치되어있지 않도록 합니다.
|
# emerge -C ssmtp sendmail postfix exim
|
아래와 같이 Qmail을 설치합니다.
|
# emerge /usr/portage/mail-mta/qmail/qmail-1.03-r16.ebuild
# ebuild /var/db/pkg/mail-mta/qmail-1.03-r16/qmail-1.03-r16.ebuild config
# ln -s /var/qmail/supervise/qmail-send /service/qmail-send
# ln -s /var/qmail/supervise/qmail-smtpd /service/qmail-smtpd
# rc-update add svscan default
# /etc/init.d/svscan start
|
5.2. Install RELAY-CTRL
relay-ctrl은 어디에서든지 이메일 클라이언트로 이메일을 보낼 수 있도록 해줍니다.
|
# emerge relay-ctrl
# cd /etc/tcprules.d/
# nano -w tcp.qmail-smtp
|
/etc/tcprules.d/tcp.qmail-smtp파일을 편집합니다. 맨마지막의 internal ip address만 서버 주소로 설정하면 됩니다.
|
# vi /etc/tcprules.d/tcp.qmail-smtp
... 생략
192.168.0.100:allow,RELAYCLIENT="",RBLSMTPD=""
|
편집이 끝났으면 다음 명령을 내려줍니다.
|
# tcprules /etc/tcprules.d/tcp.qmail-smtp.cdb /etc/tcprules.d/.tcp.qmail-smtp.tmp < \ /etc/tcprules.d/tcp.qmail-smtp
# /etc/init.d/svscan restart
|
5.3. Install VPOPMAIL
vpopmail을 설치합니다.
|
# emerge vpopmail -pv
# emerge /usr/portage/net-mail/vpopmail/vpopmail-5.4.13-r1.ebuild
|
MySQL에 root로 로그인 한 후 다음과 같이 DB생성 및 사용자 생성을 합니다.
|
# mysql -uroot -p mysql
mysql> create database vpopmail;
mysql> use vpopmail;
mysql> grant SELECT, INSERT, UPDATE, DELETE, CREATE, DROP on vpopmail.* to vpopmail@localhost identified by '암호';
mysql> flush privileges;
mysql> quit;
|
vpopmail의 MySQL 유저 패스워드 설정을 합니다.
|
# nano /etc/vpopmail.conf
... 생략
# Read-only DB
localhost|0|vpopmail|password|vpopmail
# Write DB
localhost|0|vpopmail|password|vpopmail
|
password를 좀전에 설정한 암호로 설정합니다.
만일 메일을 받는데 문제가 생기면 /etc/vpopmail.conf의 소유가 root:vpopmail로 되어있고 권한이 640(rw-r-----)로 되어있는지 확인합니다.
|
# chown root:vpopmail /etc/vpopmail.conf
# chmod 640 /etc/vpopmail.conf
# chown root:vpopmail /var/vpopmail/bin/vchkpw
# chmod 4711 /var/vpopmail/bin/vchkpw
|
다음 명령으로 도메인을 추가합니다.
|
# /var/vpopmail/bin/vadddomain test.linuxpc.info
|
다음 명령으로 사용자를 추가합니다.
|
# /var/vpopmail/bin/vadduser admin@test.linuxpc.info
|
다음 명령으로 사용자를 삭제할 수 있습니다.
|
# vdeluser jklee@test.linuxpc.info
|
5.4. Install Courier-IMAP as IMAP & POP3 Server
다음과 같이 courier-authlib 과 courier-IMAP을 emerge합니다.
|
# emerge -av /usr/portage/net-mail/courier-imap/courier-imap-4.0.4.ebuild
|
일반적으로 courier-imap 설치시 courier-authlib를 선행 설치하지만 확인 후 설치 되지 않았다면 emerge courier-authlib로 설치하도록 합니다.
다음으로 courier-authlib가 vpopmail 모듈을 사용하도록 다음과 같이 편집합니다.
|
# nano -w /etc/courier/authlib/authdaemonrc
authmodulelist="authvchkpw"
authmodulelistorig="authvchkpw"
|
다음과 같이 courier-imap 설정을 합니다.
|
# nano -w /etc/courier-imap/imapd
IMAPDSTART=YES
MAXPERIP=20
MAILDIR=.maildir
MAILDIRPATH=.maildir
PRERUN="envdir /etc/relay-ctrl relay-ctrl-chdir"
LOGINRUN="relay-ctrl-allow"
|
imapd-ssl, pop3d, pop3d-ssl 파일들도 역시 IMAPDSTART만 제외하고 똑같이 설정합니다.
courier-auth, courier-imap 시작합니다.
|
# rc-update add courier-authlib default
# rc-update add courier-imapd default
# rc-update add courier-pop3d default
# /etc/init.d/courier-imapd start
# /etc/init.d/courier-pop3d start
|
VPOPMAIL을 통한 SMTP인증 설정을 다음과 같이 합니다.
|
# nano -w /var/qmail/control/conf-smtpd
TCPSERVER_OPTS="${TCPSERVER_OPTS} -R"
QMAIL_TCPSERVER_PRE="${QMAIL_TCPSERVER_PRE} envdir /etc/relay-ctrl relay-ctrl-chdir"
QMAIL_SMTP_PRE="${QMAIL_SMTP_PRE} relay-ctrl-check"
QMAIL_SMTP_AUTHHOST=$(<${QMAIL_CONTROLDIR}/me)
[ -z "${QMAIL_SMTP_POST}" ] && QMAIL_SMTP_POST=/bin/true
QMAIL_SMTP_CHECKPASSWORD="/var/vpopmail/bin/vchkpw"
QMAIL_SMTP_POST="${QMAIL_SMTP_AUTHHOST} ${QMAIL_SMTP_CHECKPASSWORD}
${QMAIL_SMTP_POST}"
|
vchkpw권한을 변경합니다.
|
# svc -t /var/qmail/supervise/qmail-smtpd
# chmod u+s /var/vpopmail/bin/vchkpw
|
5.5. QMAIL 튜닝하기
다음과 같은 설정으로 메일보내기 속도를 향상 시켜줍니다.
|
# nano -w /var/qmail/control/conf-common
TCPSERVER_OPTS="-H -R -l 0 -p -v"
|
-l은 소문자(L)입니다. 0은 숫자 0입니다. 내용을 위와 같이 바꿉니다.
5.6. Install Razor v2
5.7. Install Spamassassin
|
# emerge -av spamassassin
|
Spamassassin 설치시 에러가 발생할 경우 다음 perl을 사용하여 razor에 필요한 라이브러리
설치를 해야합니다.
|
# perl -MCPAN -e shell
# tell the cpan shell to follow the dependency tree and automatically grab any required modules
o conf prerequisites_policy follow
# make sure we have all the SpamAssassin prerequisites installed
install Digest::SHA1 HTML::Parser Storable MIME::Base64 DB_File Net::DNS Net::SMTP Mail::SPF::Query IP::Country::Fast BerkeleyDB
exit
|
Gnome을 설치했다면 기본적으로 spamassassin이 설치됩니다.
5.8. Install Clam Anti-virus
clamav를 설치합니다.
종속관계를 확인하고, yes을 입력합니다.
Clam Anti-Virus 환경을 설정합니다. 주의!! Example라인 앞에 주석을 꼭 달아야 합니다.
|
# nano -w /etc/clamd.conf
#시스템 로거를 사용하게 함
LogSyslog
# 비정상 종료로 인한 소켓 제거
FixStaleSocket
# clamav 계정으로 clam anti-virus 구동
User clamav
|
Clam Anti-Virus 업데이트 데이터베이스를 설정합니다.
|
# nano -w /etc/freshclam.conf
#시스템 로거를 사용하게 함
LogSyslog
# 데이터베이스를 clamav 계정소유로 설정
DatabaseOwner clamav
# 데이터베이스 업데이트 미러 설정
DatabaseMirror db.us.clamav.net
DatabaseMirror database.clamav.net
# 업데이트후 clamd에 알림사용
NotifyClamd
|
바이러스 엔진 업데이트을 스케쥴링 합니다.
|
# crontab -e
0 * * * * /usr/bin/freshclam --quiet -l /var/log/clamav/clam-update.log
|
바이러스 엔진을 업데이트합니다.
런레벨 추가 및 시작합니다.
|
# rc-update add clamd default
# /etc/init.d/clamd start
|
5.9. Install Qmail-Scanner
Qmail-Scanner는 특정 캐릭터가 포함된 메세지를 검사할 수 있게 해주는 Qmail Server 에드온 프로그램입니다. 이것은 특히 바이러스로 부터 보호해주는데 사용합니다.
|
# emerge -av qmail-scanner
|
다음 파일에서 어떤 바이러스를 차단할지 설정합니다. 일반적으로 거의 모든 것들을 차단합니다.
|
# vi /var/spool/qmailscan/quarantine-attachments.txt
.vbs 0 VBS files not allowed per Company security policy
.scr 0 SCR files not allowed per Company security policy
.wsh 0 WSH files not allowed per Company security policy
.hta 0 HTA files not allowed per Company security policy
.pif 0 PIF files not allowed per Company security policy
.cpl 0 CPL files not allowed per Company security policy
|
만일 네트웍 문제로 세션이 끊어질 경우 파일들이 /var/spool/qmailscan안에 남겨질 수 가 있습니다. 따라서 qmail-scanner-queue.pl -z로 최소 하루에 한번 파일들이 삭제되어지게 해야합니다.
30시간이상 지난 파일 자동 삭제를 스케쥴링에 추가합니다.
|
# crontab -e
0 0 * * * /var/qmail/bin/qmail-scanner-queue.pl -z
|
5.10. Install Squirrel Mail
Squirrelmail을 설치합니다.
|
# emerge -av /usr/portage/mail-client/squirrelmail/squirrelmail-1.4.5-r1.ebuild
# webapp-config -I -h localhost -d squirrelmail squirrelmail 1.4.5-r1 [-I]는 대문자(i)
# cd /var/www/localhost/htdocs
# mv squirrelmail mail
|
주의할 점은 mail/data 와 mail/plugins 디렉토리들은 vpopmail:vpopmail 소유여야 합니다.
|
# chown vpopmail:vpopmail mail/data mail/plugins
|
configure을 통해 웹메일 설정을 합니다. 언어설정을 합니다.
|
SquirrelMail Configuration : Read: config.php (1.4.0)
---------------------------------------------------------
Main Menu --
1. Organization Preferences
2. Server Settings
3. Folder Defaults
4. General Options
5. Themes
6. Address Books
7. Message of the Day (MOTD)
8. Plugins
9. Database
10. Languages
D. Set pre-defined settings for specific IMAP servers
C Turn color on
S Save data
Q Quit
Command >> 10[엔터]
|
|
SquirrelMail Configuration : Read: config.php (1.4.0)
---------------------------------------------------------
Language preferences
1. Default Language : en_US
2. Default Charset : iso-8859-1
3. Enable lossy encoding : false
R Return to Main Menu
C Turn color on
S Save data
Q Quit
Command >> 1[엔터]
SquirrelMail attempts to set the language in many ways. If it
can not figure it out in another way, it will default to this
language. Please use the code for the desired language.
[en_US]: ko_KR[엔터]
|
|
SquirrelMail Configuration : Read: config.php (1.4.0)
---------------------------------------------------------
Language preferences
1. Default Language : ko_KR
2. Default Charset : iso-8859-1
3. Enable lossy encoding : false
R Return to Main Menu
C Turn color on
S Save data
Q Quit
Command >> 2
This option controls what character set is used when sending
mail and when sending HTML to the browser.
This option is used only when default language is 'en_US'.
[iso-8859-1]: utf-8[엔터]
|
|
SquirrelMail Configuration : Read: config.php (1.4.0)
---------------------------------------------------------
Language preferences
1. Default Language : ko_KR
2. Default Charset : utf-8
3. Enable lossy encoding : false
R Return to Main Menu
C Turn color on
S Save data
Q Quit
Command >> s[엔터]
Data saved in config.php
Press enter to continue...[엔터]
|
[Q]을 입력하면 환경설정을 종료할 수 있습니다. 보다 자세한 내용은 관련 문서를 참고하기 바랍니다. 웹페이지를 확인하면서 다시 설정을 변경할 수 있습니다.
아래 사이트에서 언어팩을 다운 받습니다.
|
http://squirrelmail.org/download.php
|
압축을 풀고 install을 실행시키면 squirrelmail 의 디렉토리를 입력하라는 메시지가 나타납니다. 아래와 같이 입력합니다.
|
# tar xvfz all_locales-1.5.0-20040404.tar.gz
# ./install
Please enter path to your squirrelmail installation:/var/www/localhost/htdocs/mail [엔터]
|
|
http://localhost/mail/src/configtest.php
|
localhost는 원격접속시 해당 아이피나 도메인을 입력합니다. 특별한 오류메시지가 없으면 웹브라우저에서 웹메일을 접속후 로그인을 해봅니다.

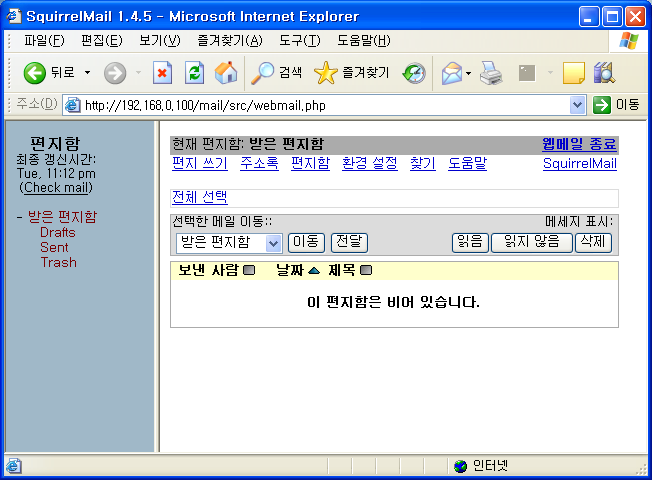
로그인후 화면은 다음과 같이 나타날 것입니다. 메일을 주고 받는 테스트를 해보기 바랍니다.
5.11. Install QMAIL Admin
웹메일 계정 관리를 웹에서 하기 위해 QMail Admin을 설치합니다.
|
# emerge /usr/portage/net-mail/ezmlm-idx-mysql/ezmlm-idx-mysql-0.40-r2.ebuild
# emerge /usr/portage/net-mail/autorespond/autorespond-2.0.4.ebuild
# emerge /usr/portage/net-mail/qmailadmin/qmailadmin-1.2.0_rc2-r1.ebuild
|
Qmail Admin은 http://test.linuxpc.info/cgi-bin/qmailadmin 으로 접근할 수 있습니다. |